
Gemstone Foundation Paper Piecing Tutorial
This is a guest post by my amazing quilty friend, Amanda Kelly of Quilt Cakes. You can find Amanda on Instagram @quiltcakes where she shares her beautiful quilting and sewing adventures! You can also purchase her patterns and makes on her website here. Let her walk you through how to create a faceted FPP gemstone block!

Before we get to the tutorial, here’s a little bit more about Amanda, in her own words:
I've been a crafter for as long as I can remember but didn't start quilting until my Gramma taught me in 2009. My Grampa actually taught me to use a sewing machine and would consistently stop whatever he was doing to help me wind a bobbin or thread a needle. I share my makes with them weekly and have been told I "have surpassed the teacher." My love language is quality time and while I live far from my family, I like to think that the time I spend on their gifts is time spent with them as I work through ironing seams and picking out bindings. I sew in the mornings with coffee, during the new rest time in our house (oh how I miss naps) and into the evenings. I've had to learn its okay to not finish a project in one sitting, one day or even a weekend. My husband is the biggest fabric purchasing enabler and my daughter consistently tells me whatever I am working on is beautiful. I only hope that one day she is as interested in sewing as she seems to be now. I love to try new quilty things and hope to create more patterns to share in the very near future.
Do you ever get burnt out with quilting? Or sewing 9,327 masks? Or making a baby quilt for your neighbor’s cousin’s niece, twice removed? Do you just need a simple, self-indulgent project? No? Just me?
I fully admit that I am guilty of project hopping. Every month it seems I need a new challenge to keep my creativity fresh and my sewjo going. This month I focused on mashing up my newfound love of foundation paper piecing (FPP) and sewing zippers to make adorable pouches for those pesky masks. With my new found addiction, I really think everyone else should be addicted too and I am going to help you nail it. FPP seems incredibly complicated at first, like only the most experienced of the master sewists can create such gorgeous images from fabrics. Yeah, that’s totally not true. Creatives of any experience level can do it and I am going to give a down and dirty walkthrough of making your very own paper pieced gemstone. You can go on and turn your glitzy gem into a mug rug, add borders and make a wall hanging, or even use it to personalize your own Basic Pouch in combination with Justine’s adorable pattern.

The things you will need to begin are:
- Printed gemstone pattern found here. You will want to cut around the edges of the big shapes (A, B, C, D sections), notice that each shape has a built in 1/4'” seam allowance.
- Assembled diagram for reference here (you probably don’t need to print this).
- Fabric scraps, fat quarters, bundles, layer cakes, whatever you’ve got — grab them! (I recommend four colors for the stone (Sections C & D) and one background color (Sections A & B).
- Scissors and a rotary blade that you don’t mind using with paper and fabric (I won’t lie, I’ve been using my special fabric scissors and blade without changing them. #yolo)
- Ruler to square things up in the end
- Shorten that stitch length up. I prefer to use 1.8 mm to 2 mm. It helps keep things secure and helps the paper tear a bit easier in the end.
-
Standard thread, needle, binding clips or pins, music/podcast, drink of choice and/or snack depending on how dangerously you live while sewing
Okay, ready? Let’s get started! (We’d love to see your finished projects — use the tag #gemstoneFPP and tag me @quiltcakes and Justine @greatheronthreadco!)
Grab your section D and a few scraps. I did not plan how the fabrics would match up and grabbed colors at random. However, you will need scraps that are big enough to cover the actual piece on the paper they are going to be representing. In FPP you will sew on the printed line and what you create will be a mirrored image on the wrong side of the paper. This is where I recommend cutting your pieces a bit larger than the shape (at least the size of the shape and ¼” seam allowance is needed; I like to go big or be sad later that I have to seam rip).

Our first seam will be sewing on the line between D1 and D2 and our fabric will be layered on underneath. Take your D1 fabric and lay it wrong side of the fabric touching the wrong side of the template ensuring you have a seam allowance that extends over the lines. You can pin your fabric here to the paper to ensure it doesn’t wiggle.

With the right side of the fabric of D1 facing up, place the D2 fabric right sides together with D1, ensuring that D2 overlaps on the line that separates both sections
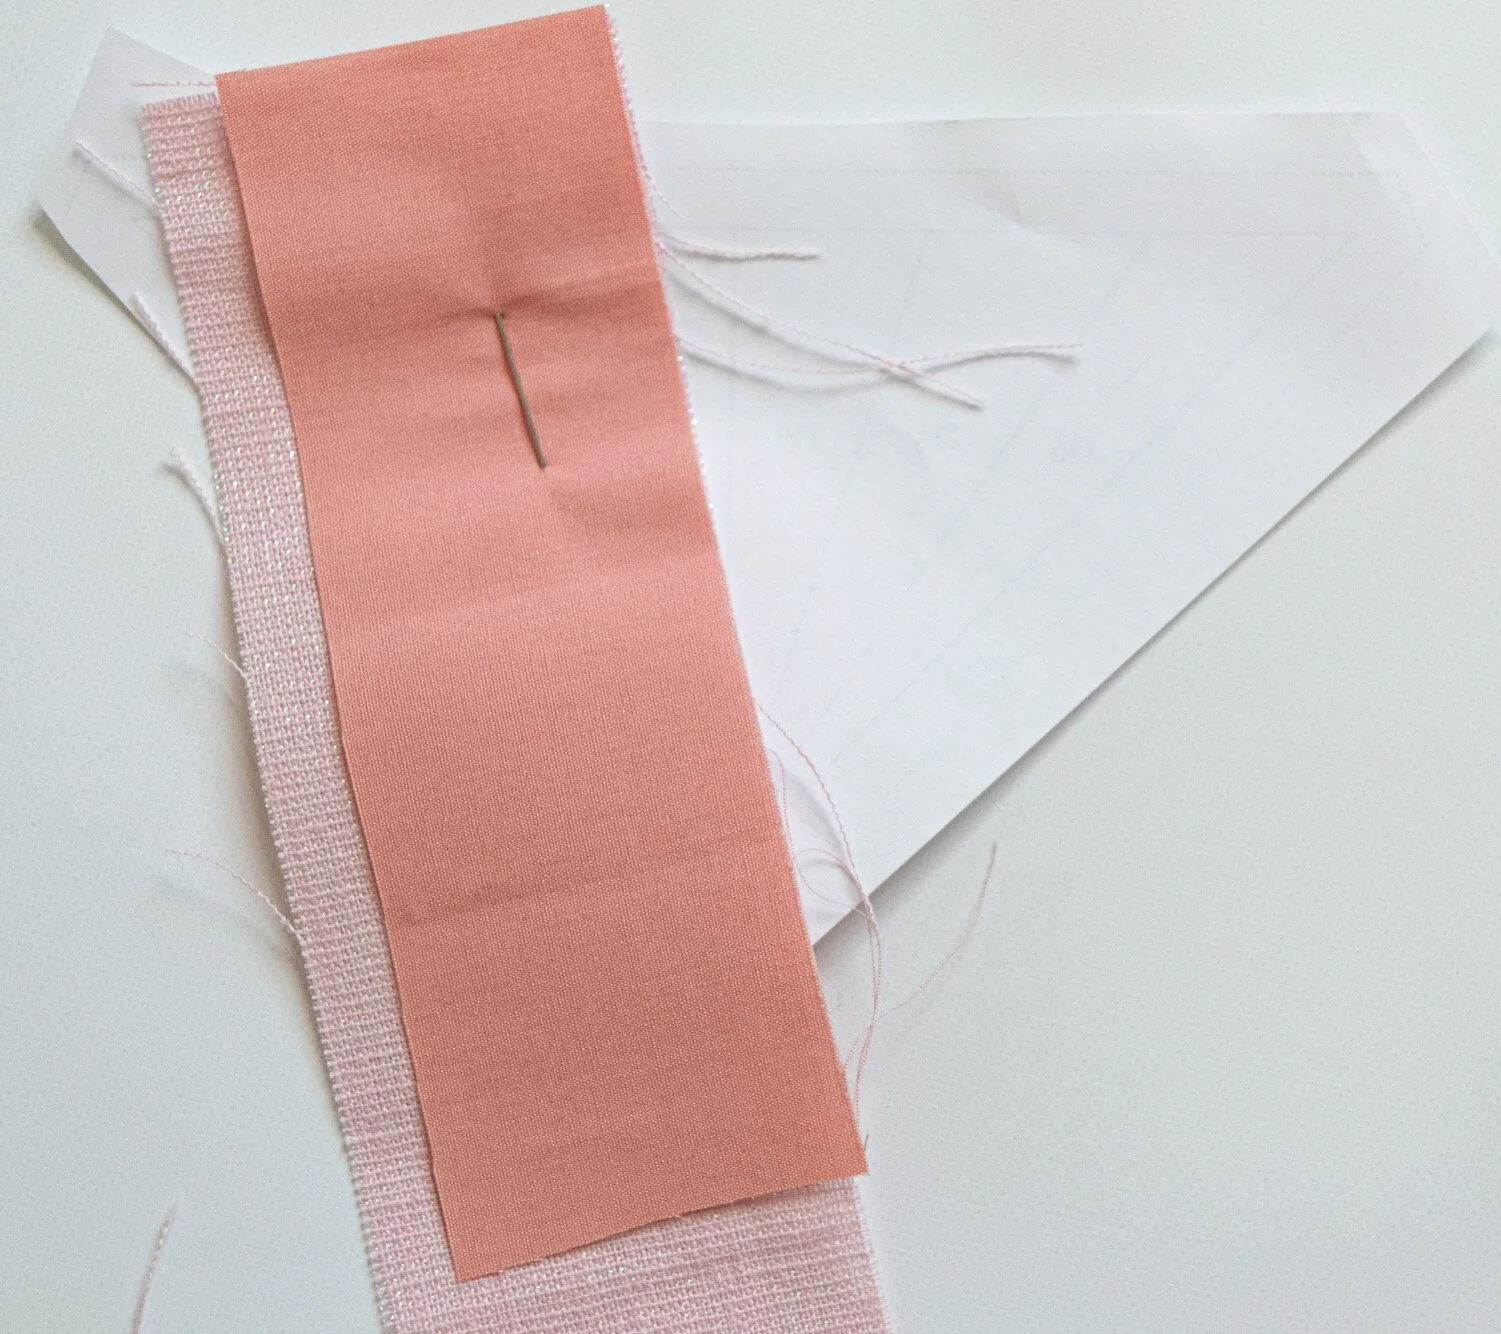
You may also pin this piece before you carefully turn the foundation, printed side facing up and begin sewing on the line separating D1 and D2.

Fold the paper along the seam line away from the fabric and trim the excess fabric away. Not only will trimming the excess reduce bulk in the end, but I’ve found that crease helps the paper tear way a lot cleaner in the end.

Once trimmed, fold everything back and carefully finger press fabric D2 away from D1. You are going to repeat the same process for the seams D2-D3, D1-D4, D3-D5, D5-D6, (easy, right?) finger pressing and trimming the excess seams in between each sewn line and embracing all the mess that is extending off the edges of the paper.

Once section D is full, you’re going to do the exact same with section C. C11 is a skinny minny piece. If you plan to turn your gemstone into something snazzy afterwards go ahead and leave it nice and wide to account for a second seam allowance or thicker border.
The fun part comes next. You get to hack away at all the crazy, extra fabric and trim your block. Using your ruler and rotary, follow along the seam allowance guide and cut away any extra paper and fabric from the edges.

Congratulations! You have the top and bottom halves of your gemstone ready to be combined. Match the pieces, right sides together, and use a couple of binding clips to hold the edges flush. Stitch along that sweet seam line and you can finally tear your first bits of paper! (This is my favorite part) I usually keep my seam ripper handy to slice into the paper bits and carefully tear away the edge pieces — this will help the gemstone lay flat when you iron the seam line open.

You’re almost there! The last two pieces sewn are A1 and B1 to the sides of your gemstone. Since A1 and B1 are singular pieces of fabric you are going to cut the background piece exactly to the shape of the templates and pin the wrong side of the fabric to the wrong side of the paper. Next, lay A1 right sides together, on the edge of your gemstone and clip/pin into place before sewing along the seam line. Trim and finger press A1 open and repeat the process with B1 on the other side.

Once all of your pieces are sewn into place, you can tear away all of the inside pieces of the foundation paper. Iron your precious gemstone one more time for good measure and revel in your accomplishment!

If you want to, you can turn your gemstones into a fun zipper pouch using #thebasicpouch pattern found here!

A HUGE thank you to Amanda for taking the time to share this magical tutorial with us! Don’t forget to check out her other work and tag her @quiltcakes with your projects!! Also make sure you use the tag #gemstoneFPP!